Farming (Agronomy)
How to Prepare the Field for a Good Potato Crop — Important Precautions
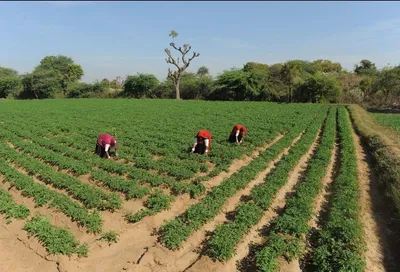
A good potato harvest does not depend only on a good variety or quality seed. Field selection, soil condition, drainage, moisture and proper field preparation also play an important role. Preparing the field correctly before planting gives the crop a stronger start.
Choose the Right Weather and Planting Time
Potato is mainly grown during the winter season in the plains. In many areas, planting is done during October–November, with harvesting generally continuing into February or early March.
Potato is grown in Punjab, Haryana, Uttar Pradesh, Rajasthan, Bihar, Gujarat, Madhya Pradesh and several other states. However, the suitable planting time can vary according to the region, variety and local weather conditions. Farmers should follow local agricultural recommendations when deciding the planting date.
1. Select a Suitable Field
Good drainage should be the first consideration when selecting a field. The field should be reasonably level and should not hold rain or irrigation water for long periods.
Potato grows well in loose, well-prepared soil. Loam and sandy-loam soils can be suitable when they have adequate organic matter, nutrients and good drainage.
Avoid fields where water drains slowly. Waterlogging can increase the risk of tuber rotting and other diseases.
2. Check the Soil and pH
A soil test before field preparation can help farmers understand nutrient availability and soil condition.
Soil pH is also important, particularly when managing problems such as common scab. Common scab is generally less severe under more acidic soil conditions. However, farmers should not add lime or other soil amendments only on the basis of assumptions about pH.
Use soil-test results to decide whether any soil amendment is actually required.
3. Remove Weeds and Crop Residues
Before preparing the field, remove weeds from the field, bunds and drainage channels. Weeds compete with the crop for water, nutrients and space and can also provide shelter for some pests and diseases.
Remove diseased plants and residues from the previous crop, especially if the previous crop had disease or pest problems. Avoid leaving infected material in the field.
4. Maintain Proper Soil Moisture During Tillage
Tillage should be done when the soil has suitable moisture.
Working very wet soil can create large clods and damage soil structure, while very dry soil can make field preparation difficult and require more effort.
Therefore, decide the number of tillage operations according to the actual soil condition, rather than following a fixed number every time.
5. Prepare a Fine and Level Seedbed
Harrowing and tillage can be used as required to break large clods and make the soil loose and suitable for planting.
The number of operations should depend on soil type, previous crop and moisture condition. The main objective is to:
- Break large soil clods
- Make the soil loose and friable
- Create a level field
- Provide suitable conditions for seed tuber development
After tillage, planking or levelling can help create a more uniform field surface and conserve soil moisture. Avoid excessive operations, especially when the soil is too wet.
6. Plan Irrigation and Drainage Before Planting
Irrigation is important, but removing excess water is equally important.
Before planting, check whether the ridges, furrows and drainage channels are properly prepared. Irrigation water should reach the crop uniformly, while excess water should be able to leave the field quickly.
Do not wait until after planting to solve drainage problems.
What Should the Field Look Like Before Planting?
Field Condition What to Check
Soil Loose, friable and well prepared
Moisture Adequate, but not excessively wet
Surface Free from large clods and reasonably level
Weeds Removed from field, bunds and channels
Crop residues Diseased residues removed
Drainage Excess water can leave the field easily
Ridges/Furrows Properly prepared for planting
These conditions can support better emergence and early crop development.
7. Use Fertilizer Based on Soil Testing
Potato requires balanced nutrition. A soil test can help determine which nutrients are available and what additional nutrients may be required.
Well-decomposed organic manure can be incorporated during field preparation where appropriate. Chemical fertilizers should be applied according to soil-test results and local agricultural recommendations.
More fertilizer does not automatically mean higher yield. Balanced nutrition is more important than excessive application.
Common Mistakes to Avoid
- ❌ Choosing a field with poor drainage
- ❌ Carrying out unnecessary or excessive tillage
- ❌ Leaving diseased crop residues in the field
- ❌ Applying soil amendments or fertilizers without understanding soil conditions
- ❌ Ignoring irrigation and drainage planning until after planting
- ❌ Working very wet soil during field preparation
PB Takeaway
A good potato crop starts with a well-prepared field. Select a suitable, well-drained field, test the soil, remove weeds and diseased residues, maintain proper soil moisture during tillage, prepare a fine seedbed and plan irrigation and drainage before planting.
When these steps are combined with healthy, quality seed and proper crop management, farmers can create a stronger foundation for good crop establishment and tuber development.